Amplifier Install
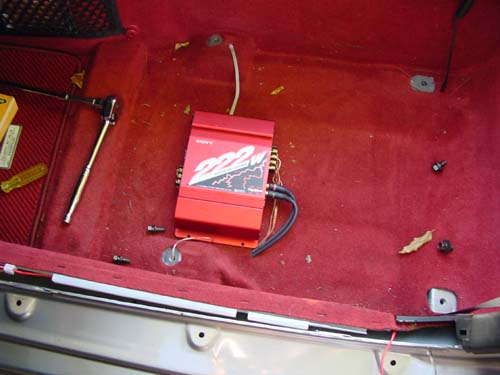
This is the little Sony 222 2 channel amp
installed in the passenger (RHD) side under the seat.
It is presently held in with strong mounting tape to the carpet. This was initially for testing purposes but has held so well I haven't bothered to replace it yet. I will eventually cut two slots in the carpet and glue two MDF (sealed to stop moisture absorbtion) rails to the floor. I will then lay the carpet over them and mount the amp on top using short self tapping screws. This should allow for better ventillation also.
The two RCA leads come from the Line Outs on the head unit. This amp also supports speaker level input for those who keep their original head unit.
The other four connectors on the back are speaker outs.
The three connectors on the front are (from top) the switch lead (turns amp on) which is connected to the Sony head units remote lead (with the stock head unit you would wire this to spare 'Accesories' fuse in the fuse box. The next connector is 12V and is wired direct from the battery with a fuse box close to the battery end. I used a fairly big cased fuse box with gold connectors, but a simple inline fuse will suffice. You could also wire it to the non-switched spare fuse socket under the dash. The last connector is the ground, to which I attached a short lead and a crimped ring connector. This is attached to the seat bolt wen the seat is replaced and makes a good earth.
The sound improvement with an amp is quite phenomenal. Even with the Sony head unit which boasts 50W per channel (PMPO) you can find you are getting quite a lot of distortion at high volume (like when trying to compete with road noise). This amp puts out 100W per channel (PMPO, about 35W RMS).